[This is part of my FIREPLACE MANTEL-103 series.]
It’s especially important to read through this whole post for the installation sequence to make sense.
Impress Your Friends With Inset Panels
Inset panels are an option on this design, but boy do they look nice!
This post shows step by step how to lay out the corbels and the inset panels on the front pilasters.
It’s not at all complicated and the results are fantastic!
Installing the Corbels
I bought this set of corbels from a local lumber yard in Rochester, Michigan. It’s a common design you can find at most any good lumber yard or molding & millwork supplier
I prefer using resin or plaster corbels for their superior resolution, not to mention it seemed a shame to cover maple with paint.
But we wanted to get the project going, so we used what was locally available.
Before you install your beautiful corbel, you have to install the underlying structure that will make up the inset panels on the front of the pilasters.
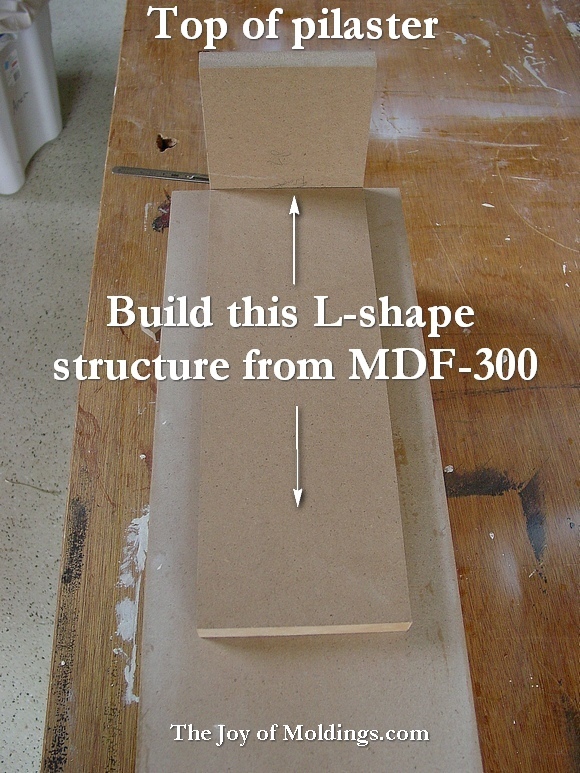
For this project that means making this L-shaped structure (which its dimensions are dependent on the specific corbels you buy) and then gluing and nailing it in place.
Below Here is what the top of you L-shaped structure should look like.
Note that it is flush with the top of the pilaster core.
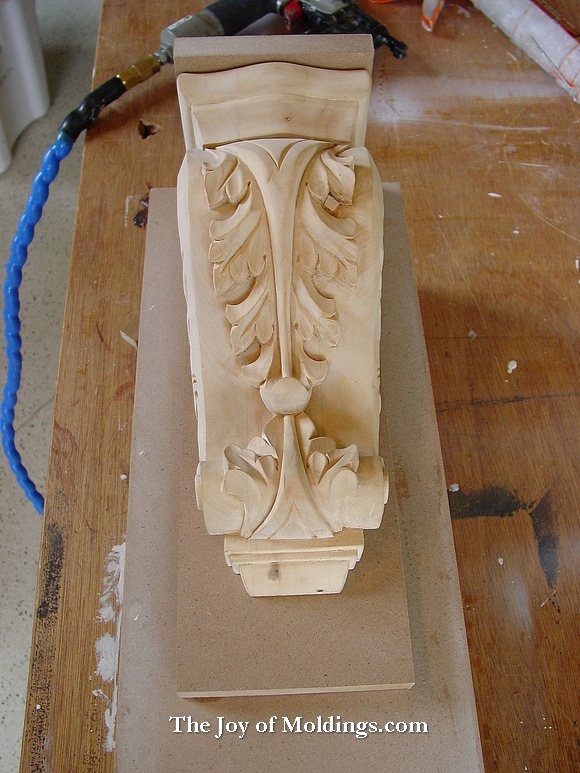
Below Now I apply plenty of Liquid Nails to the back and the top of the corbel.
Don’t use too much or the glue will squeeze out between the corbel and the mdf surface. Also, you want it to sit flush against that surface, so gently run the corbel back and forth to distribute the glue evenly while the corbel settles down firmly on the mdf.
I also shot a couple of 18 gauge brad nails into the corbel for a little extra peace of mind.
Below Now you have a structure for the inset panel frames to butt up against.
Making the Inset Panel Frames (So easy!)
Rip some 1″ (or whatever width you decided on) wide strips to use for the vertical sides of the inset panel box.
Below Cut the base block the exact same width as the L-shaped block that the corbel is mounted to.
The height of this base block is determined by the height of the baseboard molding you decide to use around the bottom.
Below Now you know exactly where to cut your 1″ wide strips. So scribe and then cut them.
Below Glue both sides of all contact surfaces.
Then use a 23 gauge micro pinner to hold all the pieces in place.
Cut & Install the Panel Insert
Why insert a piece of MDF-100 into the panel instead of just finding a screen molding that fits taller, you ask?
Because adding the insert gives yet another level of elevation to you pilasters. This is a subtle thing, to be sure, but in this case I felt the effort worthwhile.
Below With the insert glued and tacked in place with a few 23 gauge micro pins (or no pins and just glue if you like), you can cut to fit each of your PM-004 pieces.
Below Then glue and pin them in place.
And that’s all there is to that.
Are you surprised how easy it is to install the corbel and make the inset panel?
I hope you’re encouraged to try building this mantel yourself, because if you can make the pilasters, then you can make everything else — no problem!
Posts in this Series
1. How to Build FIREPLACE MANTEL-103 for $333.08
2. How to Build FIREPLACE MANTEL-103 Part 2: Materials Inventory
3. How to Build FIREPLACE MANTEL-103 Part 3: Pilaster Cores
4. How to Build FIREPLACE MANTEL-103 Part 4: Corbels & Inset Panels
5. How to Build FIREPLACE MANTEL-103 Part 5: Shadow Pilasters
6. How to Build FIREPLACE MANTEL-103 Part 6: Wrapping the Crown Molding & Base
7. How to Build FIREPLACE MANTEL-103 Part 7: Pilaster Extensions
8. How to Build FIREPLACE MANTEL-103 Part 8: Lanterns
9. How to Build FIREPLACE MANTEL-103 Part 9: Lantern Crown & Collar
10. How to Build FIREPLACE MANTEL-103 Part 10: Paneled Frieze
11. How to Build FIREPLACE MANTEL-103 Part 11: Making the Hood
12. Before & After: Great Room Fireplace Mantel with Overmantel


